Setting Up and Managing Tool Categories
Tool categories help organize equipment in your space into logical groups, making it easier for users to find and select machines.
Overview
Tool categories are:
- Space-specific: Categories you create are unique to your space
- Visual organizers: Help users find equipment when signing in
- Flexible: Can be customized to match your space's needs
- Independent: Not related to machine permissions or Canvas Badges
This guide will cover setting up and editing tool categories in your space. Please check out our guide on editing machines for how to modify the tool categories on a given machine.
Looking to assign tool categories to machines? Check our guide on editing machines.
Don't confuse Tool Categories with Machine Types! While they may sound similar, they serve different purposes. Learn more about Machine Types.
Example Organization
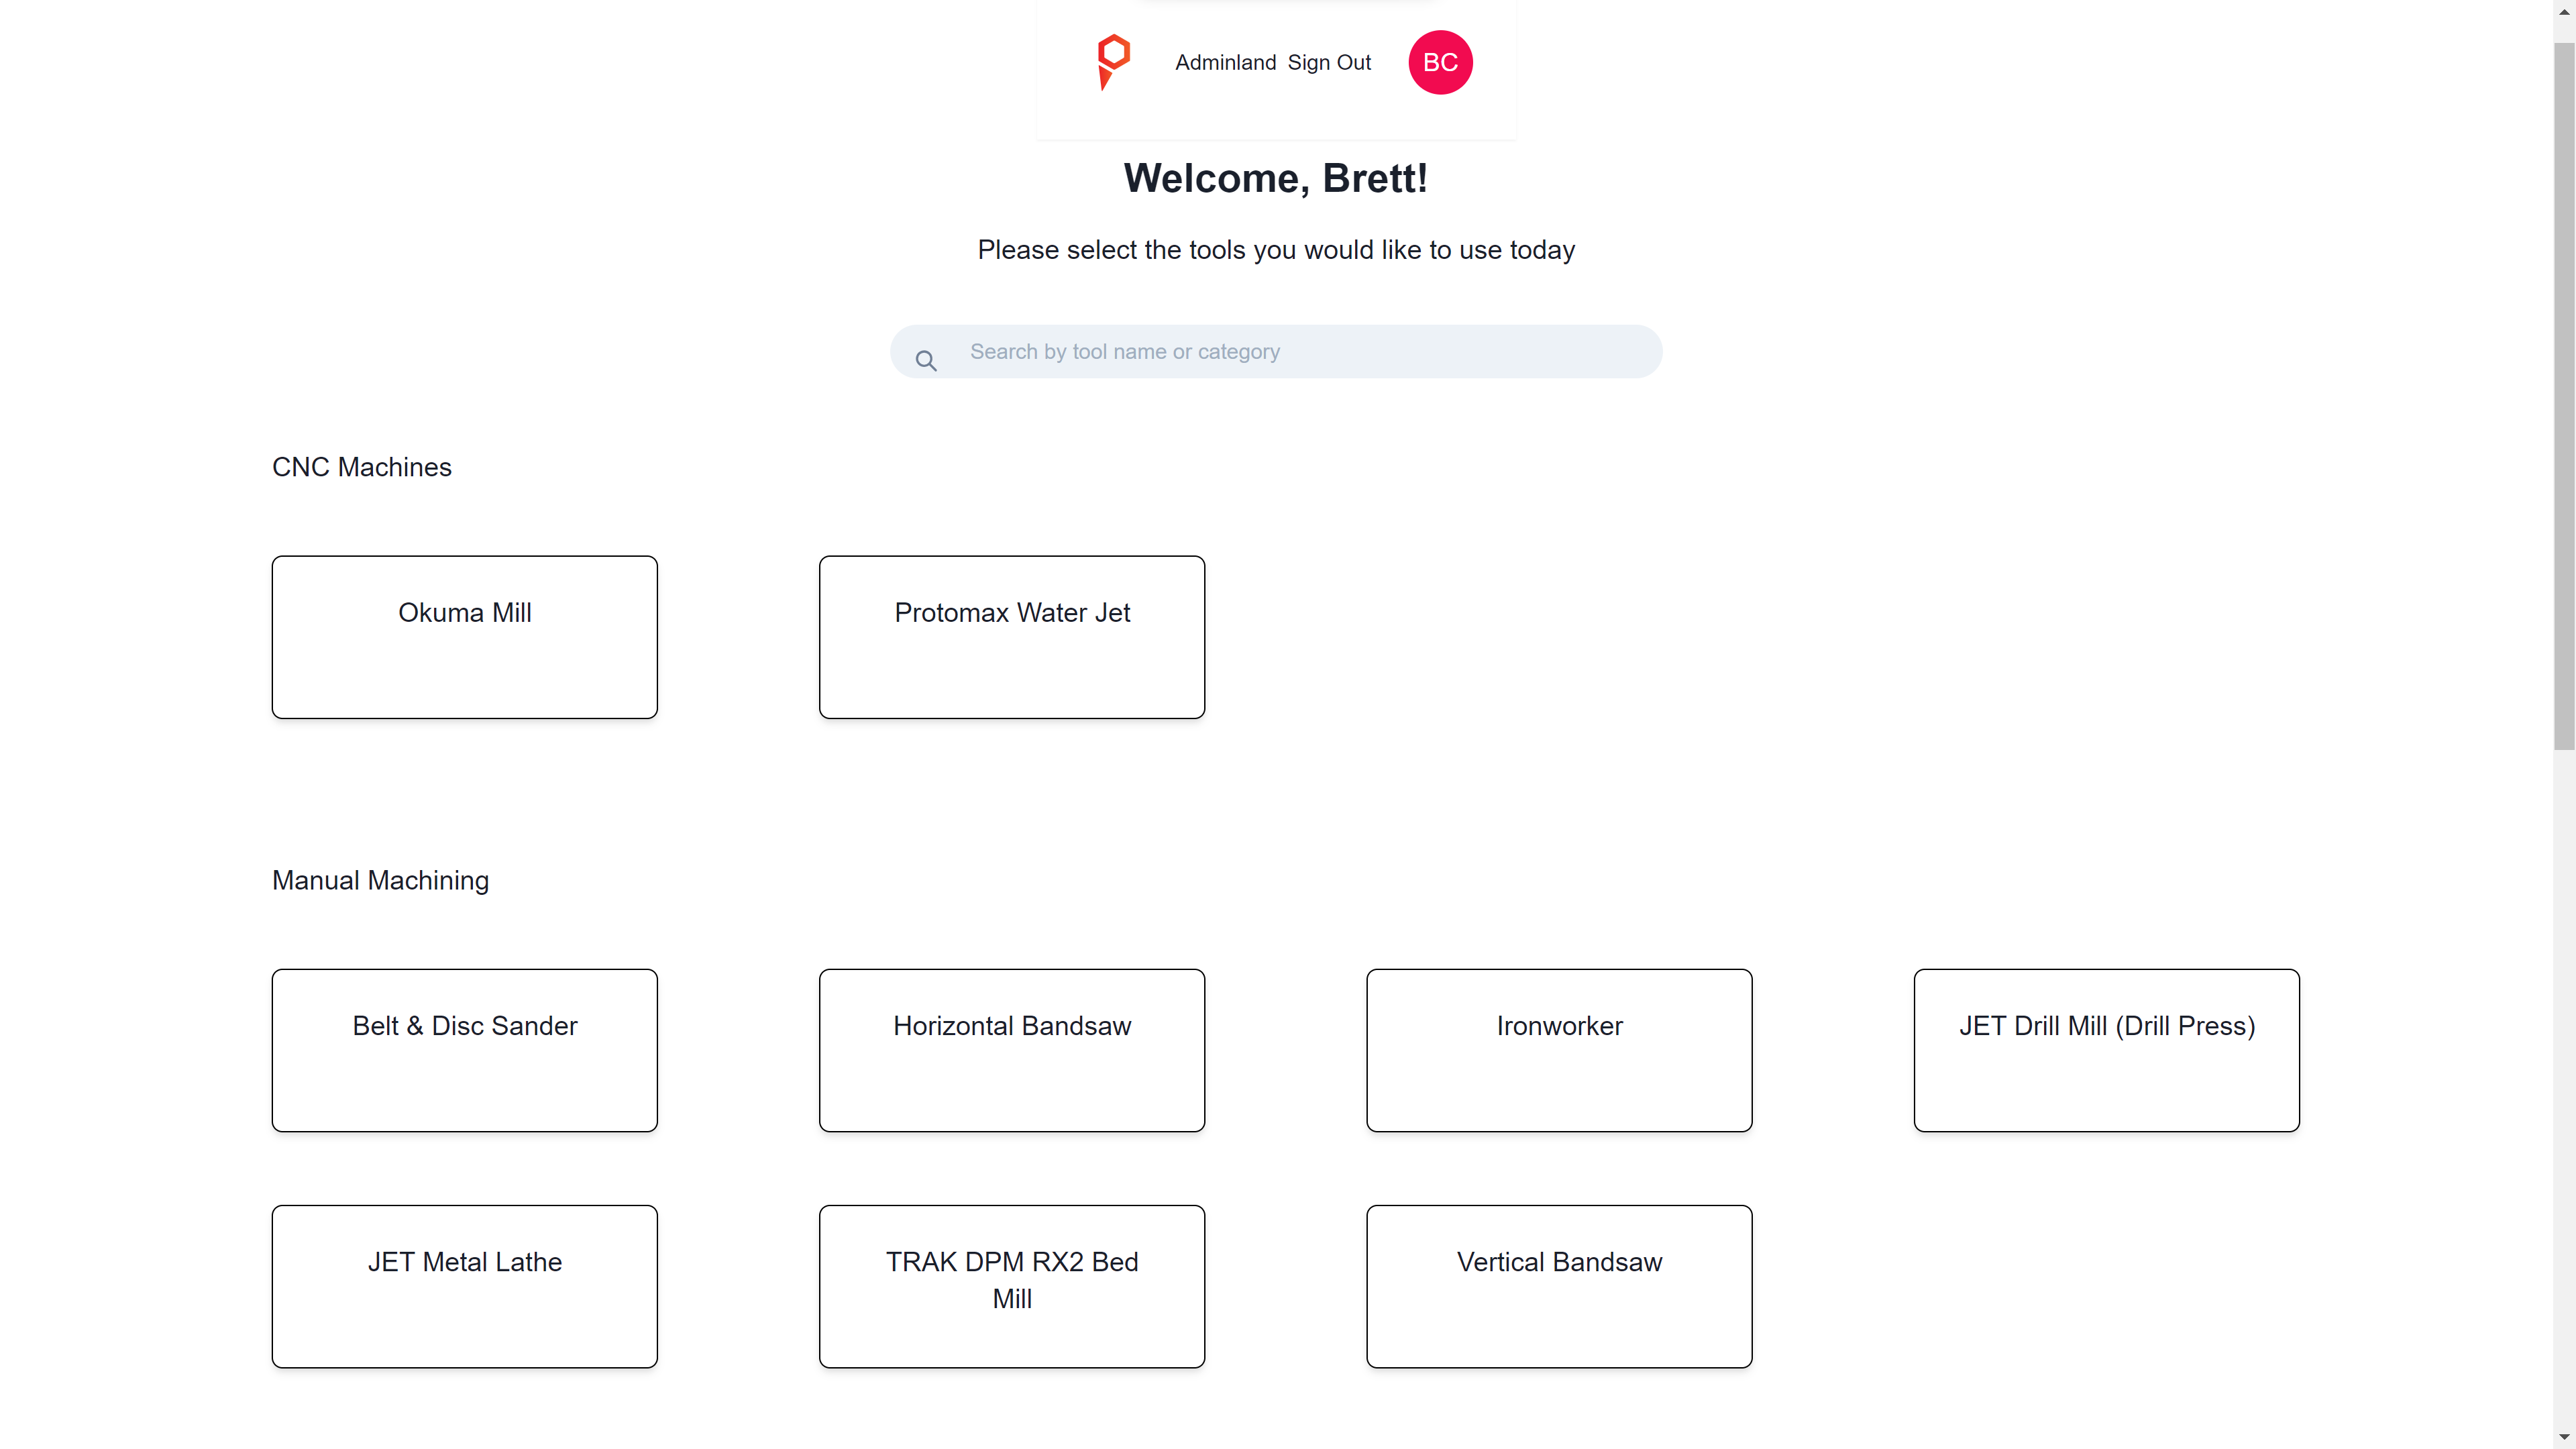
Here's how the Terrapin Works Instructional Fabrication space organizes their equipment:

In this example, equipment is divided into two categories:
- CNC Machines: For computer-controlled equipment
- Manual Machining: For manually operated tools
Best Practices
- Create broad, intuitive categories
- Avoid categories with very few tools
- Use names that make sense to your users
- Group similar equipment together
- Consider how users search for equipment
Adding or Editing Tool Categories
-
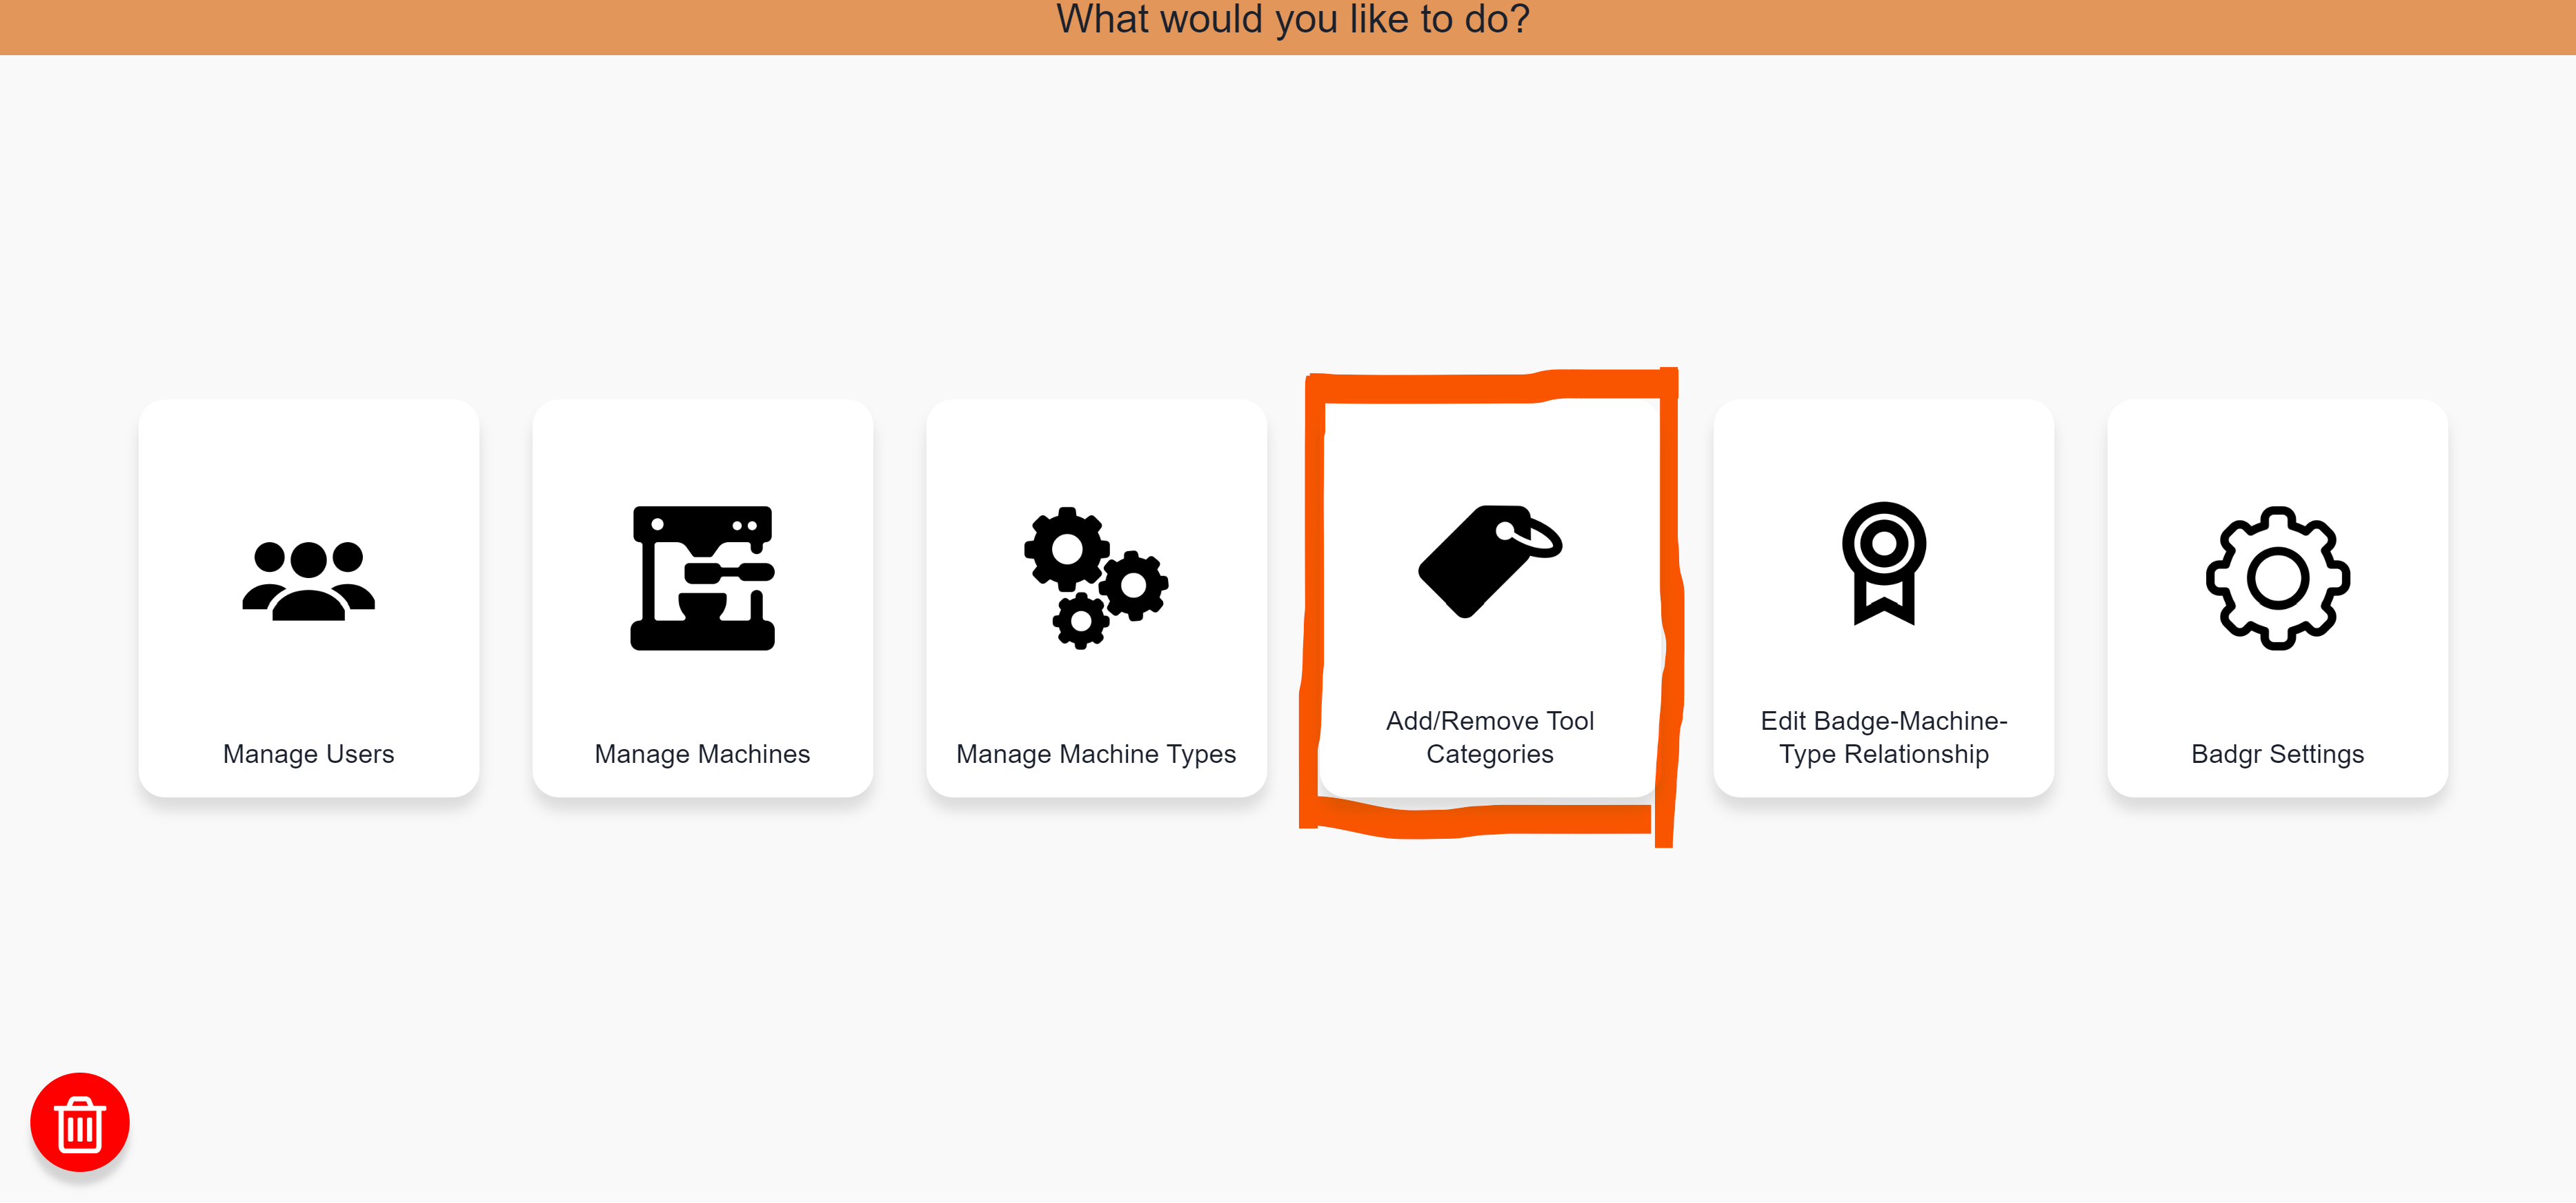
Sign into Pinpoint, select the space you want to manage, and select "Add/Remove Tool Categories".

-
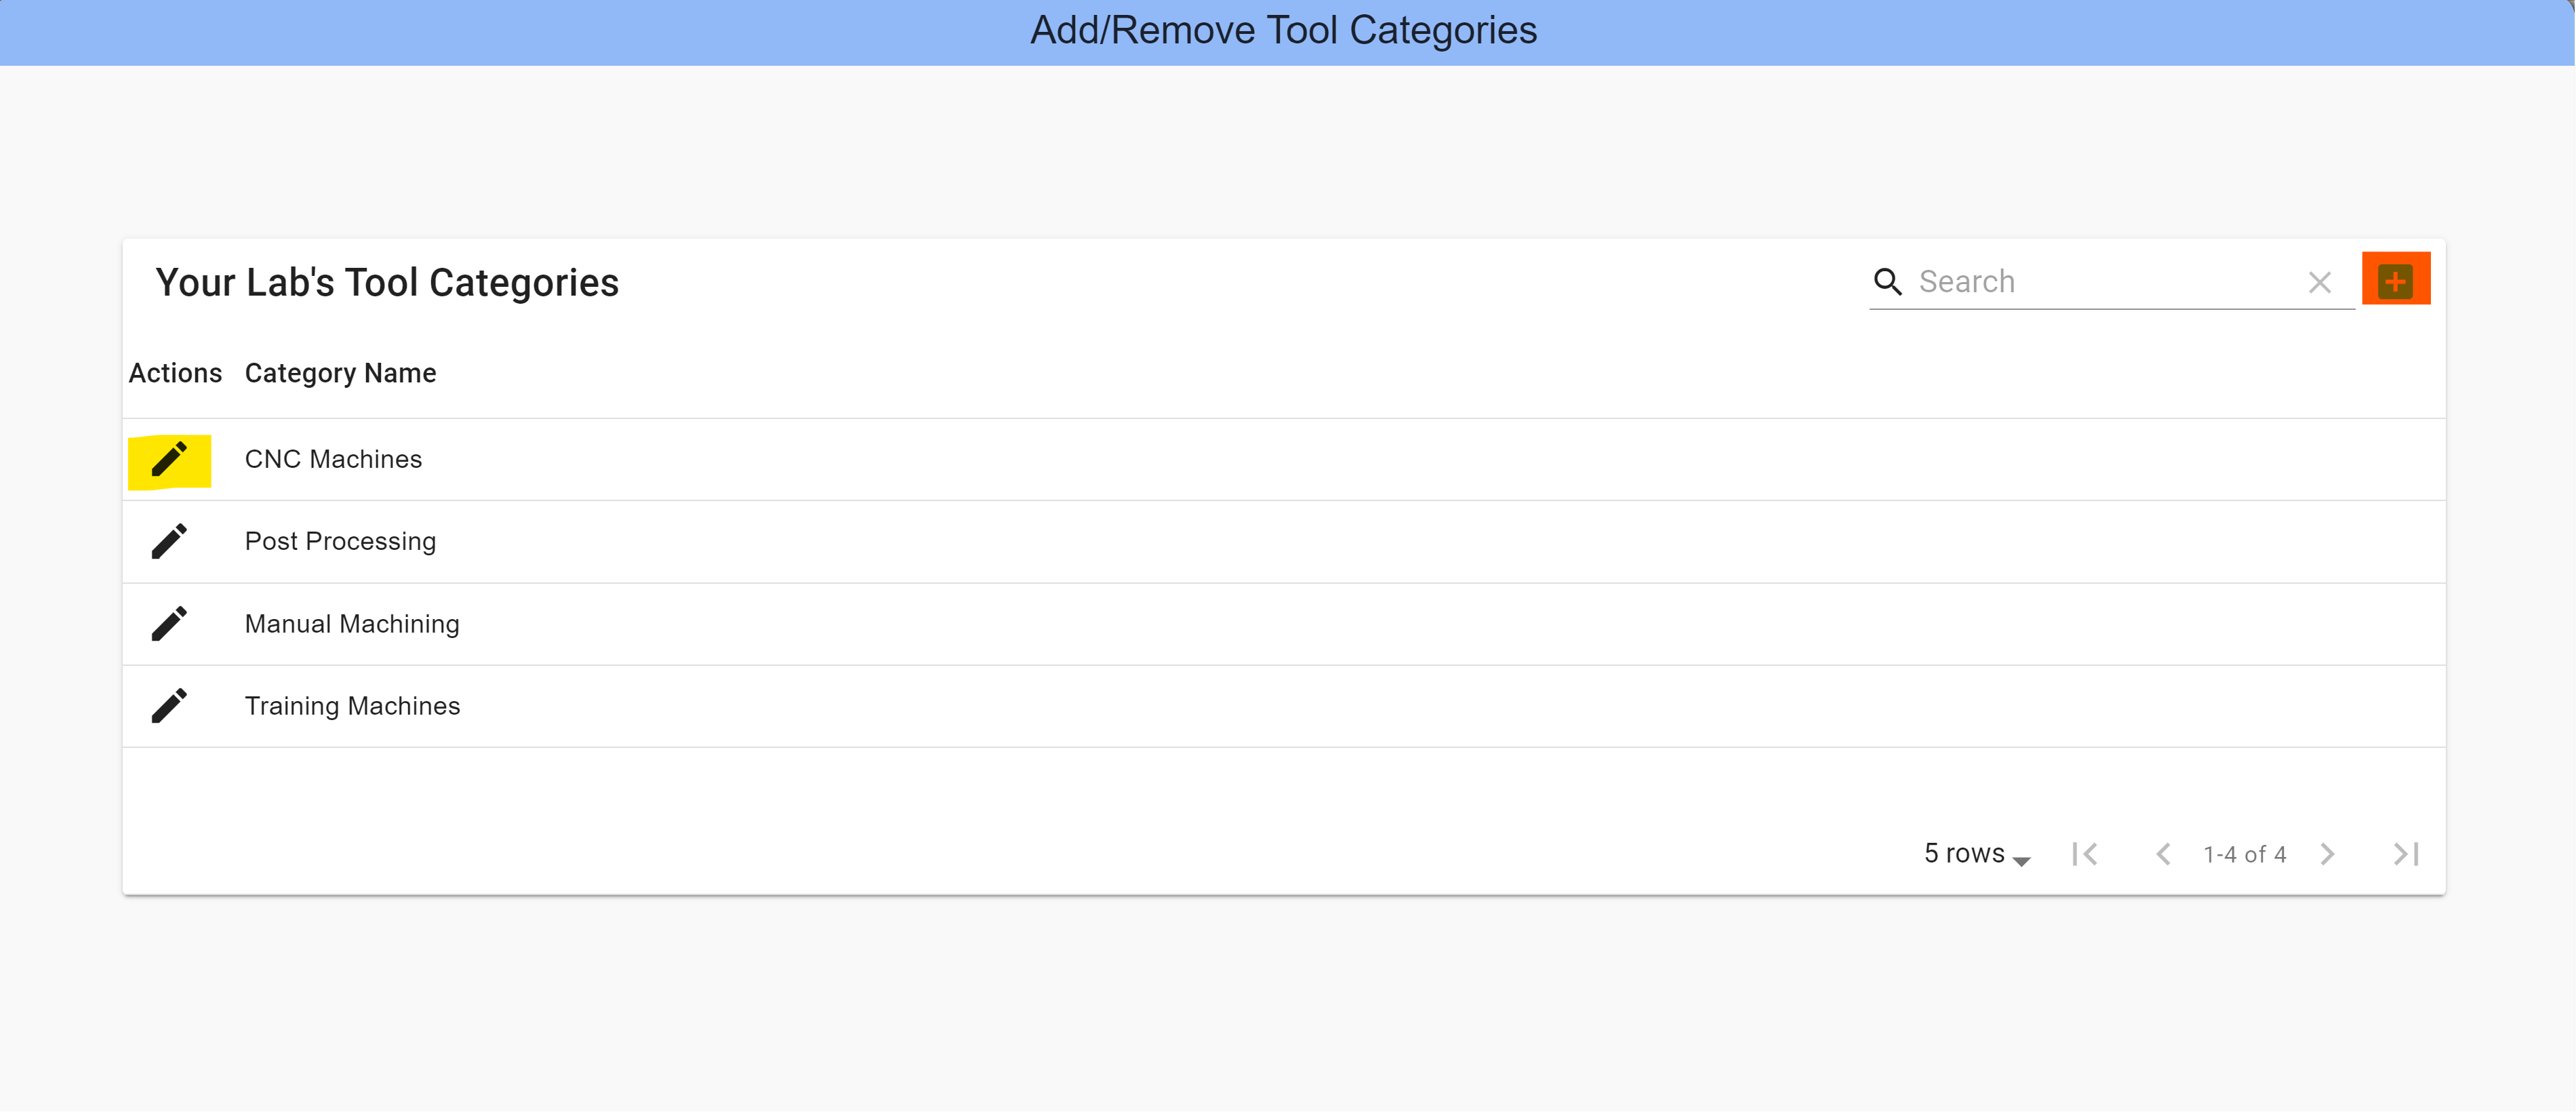
To add a new tool category, click the plus icon on the top right. To edit an existing tool category, click the pencil icon next to an existing tool category. Enter/update the name of the tool category, and click submit.

The ability to remove tool categories will be added in a future update. For now, you can only add and edit categories.